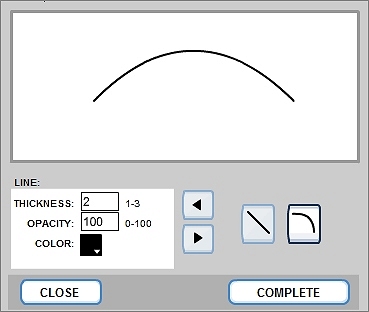
Straight or Curved: On the Concept Map Builder (CMB), there are two options for line type: straight or curved. At right, roll over the line shape icons to see examples of straight and curved lines. Arrows: On the CMB, clicking on the arrowhead buttons in the center of the line builder allow you to add or remove arrows from a line. At right, roll over the left-pointing arrowhead to see a curved line with left arrow. Roll over the right-pointing arrowhead to see a curved line with two arrowheads. Line - Thickness: On the CMB, you can select a line thickness between 1 (thin) and 3 (thick). Line - Opacity: On the CMB, opacity changes from (0 to 100) will adjust the intensity of the line. Line - Color: On the CMB, click on the color block to select a line color. At right, roll over the "Line" box to see an example of a thick purple curved line with two arrowheads at 50% opacity. Complete: To save the line to your map, click the COMPLETE button. Above, roll over the "COMPLETE" button to see how the line would look on the CMB work space. Close: To discard the line, click the CLOSE button. TIP: Consider using lines to create custom shapes, such as triangles and polygons, for your concepts. Previous | Next | Index | |||||||||